
Hello!!
This is the long awaited tutorial for the scallop wall in my daughter's nursery! I've back dated the post so it will show up immediately after the reveal post, but am actually writing this a year and a half later... hope my memory's not too foggy!! But truthfully, this process was not terribly complicated. Just time consuming and tedious.
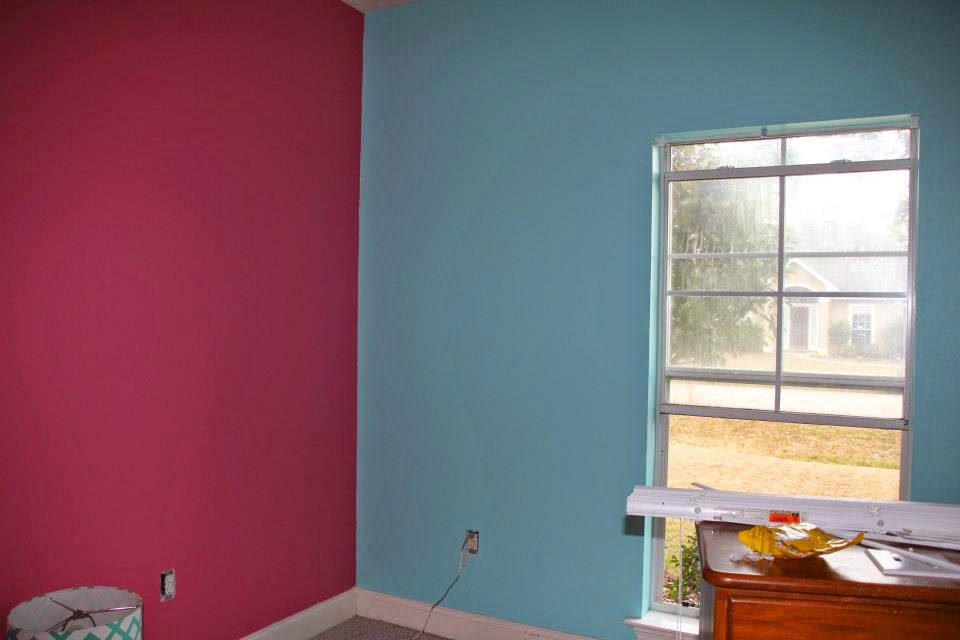
This is where we started... Boooring. At the time, this was the color of all but one wall in our house, and I hate it.

I. Love. Color. So when it came time to create a masterpiece for the nursery, I had to go a little crazy!
This super pink. LOVE it, and it covers three walls in the nursery.

This is the lighter of the two blues. The night before the big project, we went ahead and painted the pink walls, and we painted the entire accent wall this lighter blue.

...and this is what it looked like in the morning! Honestly, I would have been happy with it just like this, and my mom, who did most of the painting, tried her hardest to convince me. BUT I had a mermaid nursery to create, and there was no stopping me!
After painting the walls, we went to work on the template. I happened to have a big box in the attic from a TV we got several years back. we cut one side and unfolded the box to make one long strip. We made one scallop the size I wanted by using a pin, some string and a pencil. Stuck the pin, tied the string around it and the pencil and then drew a half circle. Then we used an xacto knife to cut it out! We used that template to draw the scallops across the long strip of cardboard as seen in the photo below, leaving about two inches between the point of the scallop and the top of the cardboard. Sorry for the quality! Had to grab this one from instagram...
Then, again, we used the knife to cut the long strip of scallops.

A couple of friends came over the next morning for the hard part. TRACING. This was definitely the hardest part. Especially because I did NOT want the scallops to begin in the corner right at their point... I don't know, I'm weird... Anyway, much harder than it sounds, they held the template and traced around it LIGHTLY with a pencil, and they just moved down the wall.

And here they are! All traced on, and you can see where we had to make some adjustments... That's due to my weirdness with the points not starting in the corner.

And the painting began!! I'm guessing we did the x's so we wouldn't paint the wrong scallops, but can't totally remember. This is my sweet friend Angie who brought her tiny paint brushes over to take care of the those tiny points. We used a bigger brush for the rest of the outline, but not too much bigger, as you can see in this photo.

This is my sweet friend Sara with the tiny roller. I guess it was four inches or so, but it really made quick work of the inside of the scallops! Like I said, the tracing was the hardest part! The outlining in paint wasn't so much hard as it was tedious and slow, the rest was easy peasy!

These wonderful ladies working hard!!

The rolling went sooo quickly, so then we were all able to help with the outlines, but we left the points to Angie and she did an amazing job!

And here it is!! The finished wall!

I think what helped the most in the process was deciding at the last minute to paint the entire wall the lighter blue the night before. I can't even imagine how much longer this would have taken if we hadn't done that!

A LOT of work... But was it worth it??
 |
| 7 weeks |
OH yes!!
 |
| 2 months |
What do YOU think??
 |
| 1 year |
 |
| 7 weeks - 6 months - 9 months - 1 year - 18 months |
where did you get that laundry basket?
ReplyDeleteSomehow I missed your comment forever ago... so sorry! I saw it on pintrest and after months of searching, finally found one for sale on ebay. Search "white wicker whale hamper" and be persistent in your searching. If there's not one today, there may be tomorrow. :)
DeleteWhat two colors did you use for the blue? This is exactly what I want to do in my nursery
ReplyDeleteAll of the paint is Valspar and the pink is definitely Frosty Berry. One of the blues is Bayside, and I'm so sad but I cannot remember the name of the second blue! I know I have a photo of the swatches somewhere.. if I find them, I'll reply here and let you know! Hope your nursery turns out perfectly!
Delete